
Welcome to your Arduboy FX Mod-Chip!
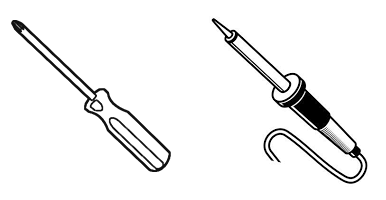
Screwdriver and Soldering Iron Required
Installation Instructions:
Upgrading your Arduboy into an Arduboy FX using the Mod-Chip is a simple procedure that takes less than 10 minutes and requires using a small screwdriver and soldering iron. (Not Included)
If you don’t feel comfortable with performing these instructions yourself or don’t have the tools, a local maker space or electronics repair store can help!
Follow along the video and use the steps below to install the Arduboy FX Mod-Chip.

New to soldering?
If you are new to soldering check out this awesome pdf guide that is available in many different languages:

Note!
Don’t turn over the Arduboy once the back has been removed, without carefully holding the PCB in place. All the buttons will come spilling out!

Step 1:
Place the Arduboy face down on a soft surface to protect against scratches. Remove the 4 screws from the rear and remove the aluminum back.

Warning!
Do not lift the battery or bend the battery tabs any more than is necessary!
Lifting the battery more than a few degrees can cause a fracture in the battery tab and cannot be fixed with solder, the tabs are laser spot welded.

Step 2:
De-solder the 2 speaker wires from the pcb. This is step is not strictly necessary but it will make placing the mod chip easier.

Step 3:
Slide the mod chip under the battery, above the speaker and line up the corresponding pads on the PCB with the holes on the mod chip. The 2 speaker wires are then routed over the top of the flex circuit of the mod chip.

Note!
Don’t use too much solder! Use only the smallest amount possible!

Step 4:
Starting with one pad only (VCC on the far right is recommended) align the mod chip so that all programming pads are centered within the holes. Once you are happy with the alignment, place the smallest amount of solder that you can on the VCC pad.
You may find that after placing the solder joint, you need to re-align the mod chip and this is normal. Return the soldering iron to the single joint and adjust the fitment until alignment is satisfactory.

Pro Tip!
Solder the RST connection last. It is close to the processor and completing the other solder joints first, you will get good practice with the amount of solder you need and have the best chance at not flooding the joint with too much solder.

Step 5:
Now align the opposite side of the mod chip and place a solder joint. Continue the process until all connections have been made.
Pay careful attention to the GND connection, on the PCB the pad is connected directly to the ground fill without a thermal and will require the solder joint extra heat (time) to properly form.
Solder the speaker connections back in place as well.
Step 6:
(OPTIONAL INTERNAL RESET)
This step is optional and can also be performed by holding the reset switch for 5 seconds. This method can be “safer” because it does not risk any mechanical harm to the reset button, which can be harmed by applying too much force. This step can also be performed in software by using the FX Activator.
Turn on the Power to the Arduboy and short the connection between ground and RST for 5 seconds. This will activate the mod chip! After about 15 seconds the bootloader is burned.
If you wish to verify the process is complete, carefully hold the PCB within the front cover so that it retains the front buttons and turn the Arduboy over, you should see the FX boot screen.
After the bootloader has been burned you can turn off the Arduboy.

Step 7:
Place the back cover on the Arduboy and tighten the screws. Do not overtighten the screws! The screws have a thread locking material so snug is good enough!

Warning!
The reset button can be broken by using excessive force! The button does not have very much travel and is very picky to be pressed in the middle. It’s not too bad, really, but people have broke it before. Just be careful!

Step 8:
If you did not perform step 6 to perform the reset internally, you can now use the reset button to program the Arduboy with the new bootloader by holding it for 5 seconds.
Alternatively, you can use the FX Activator to perform the update in software.

Warning!
If any stage of the activation process fails to verify, DO NOT BURN THE BOOTLOADER! Attempting this will brick the Arduboy and will require an external programmer to recover.
Step 9:
(For Hardware-Only Mod-Chips)
This step can also be performed to update the firmware on the mod-chip.
Download and run the activator software by following the instructions in this link:
Step 10:
Enjoy your new Arduboy FX!
By pressing the red round A or B buttons from the boot screen will load the previously flashed game, after selecting a game the buttons will flash the game and begin playing.
Left or right selects categories.
Up and down scrolls through the games in that category.
Once you are in a game you can hold up and down buttons at the same time to reboot to the FX loader menu.
If you’d like to see the boot menu instructions it’s in tools called “Arduboy FX Welcome”
Step 11:
Tell all your friends about your new Arduboy FX on social media!
Troubleshooting:
If you have any problems with the upload or verification process, turn off the Arduboy and reinspect all of the solder joints. The following symptoms and their likely cause are identified below.
FX activator uploads but cannot detect Mod chip or Flash chip: VCC & GND connections
Mod detected but not Flash chip: SDA connection
Flash chip detected but not Mod: SCL connection
Mod chip fails to verify: MISO, MOSI, CLK connections
Stuck in boot loop after attempting bootload: RST connection
If you have a pre-programmed mod-chip and attempt the automatic update and it does not perform as expected, download and flash the FX Activator so you can more easier diagnose the problem.
If you are still having trouble with your upgrade attempt please post a thread in the Arduboy Community so that more people can help.